One of my goals is to bring more cartooning into the world, and therefore, I'm going to write a little bit here and there about "how to cartoon". This comes from a place of dabbling in drawing and cartooning for years, but only getting more serious about it just in the past few years — the part I've figured out isn't how to make really polished stuff, it's how to get some results reasonably quickly, without feeling frustrated. Overcoming the frustration is different from getting a pretty picture, and the starting point for that is to clarify some terms and tools.
Common terms
Doodling, drawing, illustration and cartooning exist in a sort of spectrum of visual ideation, where they are related but not the same.
A drawing is an image made through the process of making marks on a surface with some instrument — it's a very generic term, and this creates some confusion because we're often assuming a type of drawing is being done. The techniques of drawing tend to remain similar regardless of the genre, though. An illustration is a type of visual explanation of an event or process: when we refer to a specific piece of art that is self-contained, but also part of a larger work, we can usually call it an illustration. Many modes of illustration are relatively straightforward drawings of technical processes, posed figures, etc.
Originally, cartooning was used to refer to a preparatory draft of an artwork: essentially, the complete drawing, just not using the final materials. Over time, this mode of drafting became a reference point for a style of illustration used to exaggerate and to depict imaginative fictional scenes and characters. Referring to oneself as a "cartoonist" vs an "illustrator" often doubles as a kind of branding: the skills needed to do one or the other are shared, but an illustrator will usually emphasize the technical detail of the drawing, while the cartoonist is more frequently looking for stylized meanings and symbolism. If you are making marks on the page that don't resemble what your eyes see in real life, you are probably cartooning. And if you are attempting to combine words and pictures together into graphics, you are also probably cartooning.
Cartoons typically appear in comics and animation, but a cartoon can also be used as a "spot illustration" like what I'm doing in this blog. There is a strong relationship between cartooning and graphic design, because the context of cartoons tends to be symbolic — to use pictures in the same context as dingbats or emoji. When we use pictures in this way, we're arranging them like text, for readability. A real person does not look like 🦵😀🤳, although we could point out the parts of them that are like each of those symbols. Cartooning done at scale, like for a comic strip, has a tendency to "emojify" itself into reusable elements — stock poses, expressions, and scenes that appear over and over in every strip.
A doodle is a type of drawing done with less concentration towards the specific result. Doodles tend to occur naturally when we allow ourselves to play with drawing instruments. Like many cartoonists, I tend to start by doodling, and then add in enough rigor to the drawing through successive drafts to make the image work. Therefore, one of the things I emphasize in the toolset is ease of drafting and revision.
Tools
Because we are in a digital age, one of the first things to ask is — should we focus on digital tools? I believe the correct answer for a doodler is an emphathic no. The reason why is because digital tooling emphasizes precise results. Digital is something that you can add into the process to get the precision you want, but something we have convinced ourselves of lately is that the entire process should be digital start-to-finish. When doing things this way, the computer will let you specify everything down to the last pixel, and this tends to make digital artists seesaw between either doing nothing to control the process and accepting the first thing they get as "good enough", or becoming maniacally perfectionistic and going over things again and again. Additionally, digital can produce "tech FOMO" where you might convince yourself that everything will change if you can find the combination of software and hardware. It's easier to stick to simple materials that you already have and can watch other people use, so that you have a more concrete way of evaluating yourself.
I had an experience recently where, all on the same day, I made a little bit of pixel art testing out two methods, then I went out and visited a coffeeshop and sketched there, and then I went home, and I made a little vector art piece. At the end of the evening I sat down to do some traditional inking with the lightbox — and then I spilled the ink.
Nothing was ruined: I keep my ink bottle on a cafeteria tray, so the spill wasn't doing harm. But I didn't want to waste the ink, so I suddenly found myself urgently drawing and drawing and drawing. I had a backlog of things I wanted to get to, but I originally thought I'd do them little by little. Instead I stayed up all night, and by sunrise, I was pretty fatigued, and I had made plenty of mistakes, but I had succeeded in making something with a unique energy from the incident. And looking back on the preceding day, I realized that I had worked in something like five different "art styles" — the digital ones, my coffeeshop sketch, and the stuff I made after the spill.
A certain thing that you often see in comment threads today is kids who want to "find their art style". This is built on a cultivated expectation of advancement through life, like passing a class and going to the next grade: 1. Find art style, 2. Ride off into sunset as credits roll. But what my experience shows is something that is more exciting for the journey: What the art style is, is the party you choose to show up to. Sometimes you choose the party by preparing for it, and sometimes the party finds you. I wouldn't have stayed up all night if I hadn't spilled the ink, and if I didn't stay up all night, I wouldn't have unleashed quite as much frenzied energy. It was the epitome of a Bob Ross "happy accident".
If we are doing doodling, we are engaging with the tools to help us go somewhere, and that butts up against the precision of digital: at every step digital just asks us how we want to configure the program. It's fine if we have a specific list of edits that we want to do, but it's quite bad for overcoming the "blank page". For that reason, my first recommendation is to focus on digital as a resource for enhancement. Sometimes you want to see the result of a precise specification, and that is what computers are really good at. The Internet is also really great at supplying reference materials, and this leads to using it to start a project by turning a brainstorm into a collection of references. But there's no magic button to press that will generate exactly what you want from a guess or a vague idea. You have to let attempts flow through your hands and then decide whether or not you like them, or why you're making that.
Paper
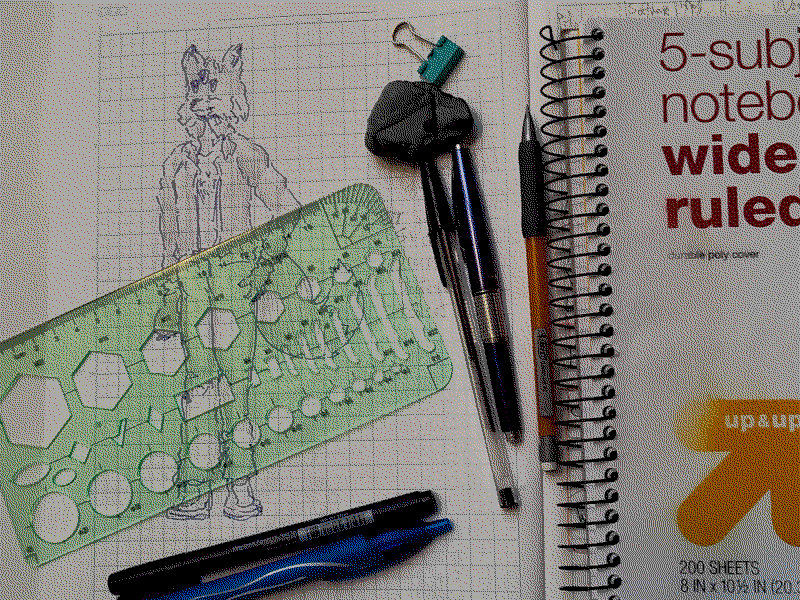
So, then, the goal is to make a toolset that uses traditional media to let us scribble a few things, and then go back and give them more thought. For this, my starting point is an regular notebook. Notebook paper has some useful qualities for drafting:
- Thin enough to be used as a tracing paper and rapidly make multiple drafts — just go to the next page and start tracing.
- Rule marks aiding graphical design elements(letters, panel grids, etc.)
- "Non-photographic" rule marks that will disappear in black and white scans
- Super cheap and widely available
- Made to work well with similarly cheap drawing tools
- Binder clips to stop pages blowing in the breeze and to organize loose paper
- A laptop sleeve or plastic bag to protect it from the elements
- Folders with pockets to store notes and drafting tools
Of course, notebook paper isn't "nice" paper — it's not the stuff you want to archive. It tends to tear if you scrub over it heavily with an eraser, and the rule lines can be distracting and make your drawings "snap" onto the lines. Professional cartoonists tend to finish on heavier drawing papers, cardstock or Bristol paper. The specific size and format varies, but most work in ink because of the historical limitations on printing technology leading them towards black and white line art, and therefore, what they are looking for is generally a very smooth finish, because that works better with ink drawings and keeps the ink from feathering out into a blob. Weight and sturdiness is desirable for wear and tear, and for materials like alcohol markers that tend to go through the paper easily. I've played with using cheaper materials like index cards and they don't work so well with inks because they feather too easily, dissolving the fine details.
The obvious alternative to notebook paper for a cheap, widely available sketching paper is printer paper. This type of paper is made for printer ink, and it eliminates the rule lines, which can be a distraction. It tends to be less sturdy than sketchbook paper made for art, but that's mostly true if you're getting the cheapest stuff: printer paper in heavier stocks also exists.
Paper stock is like produce — it's seasonal, you try to look for deals when it's in season, and hopefully you score some really good stuff. We want a mixture of "cheapo" and "nice", and while you can get good things from major brand names, you can also be pleasantly surprised by a store brand or generic sometimes. I rotate through different paper types and formats just as a way of keeping things interesting, and I would advocate testing different paper over testing different art supplies if you're making a choice between the two.
Transfers
So, how do we transfer a draft onto the "nice" paper? There are two methods that both work pretty well. One is to do a graphite transfer — scrub the back of a paper with a soft pencil, and then press the resulting surface into the "nice" paper by tracing over your draft. The key thing for this is making sure your papers are aligned, which you can do with binder clips, low-stickiness tape(to avoid damage), or my personal favorite, drafting dots — little reusable stickers.
The other way, which I prefer, is to get a light pad. This method lets you put your draft under the "nice" paper and blast light through to trace it. The nice thing about these is that it also doubles as a generic drawing board — they are quite thin, portable, and are designed to help the paper cling. Older people will recall how these kinds of devices used to need a specialized light bulb and were pretty bulky and expensive, but today LEDs do a much better job and could be safely carried around the house by children.
So, that takes care of paper. The next stop is the drafting tools. I think the primary tools can be split out into four categories: pencil, pen, eraser, and stencils. What we're looking for is a combination of "what the result looks like" and "what it feels like to use it": sometimes we want a very smooth, transparent glide, and other times we want heft, roughness and resistance. So, weight, balance, friction are all major considerations. This is one of the downsides of going digital — your choices of tool when drawing digitally are various kinds of plastic stylus, and the surface is also going to be plastic or glass, so you're left with just a handful of options for changing the feel.
Pencils
Pencils for drawing are often sold in sets of varying hardness. The hardness of a pencil indicates the ratio of clay to graphite: softer pencils contain more graphite, make darker marks, lose their point faster, and feel smoother on the page. Harder pencils are the opposite — they contain more clay, stay sharper, make lighter marks, and tend to be more scratchy. The feel of the graphite and the meaning of their hardness rating ultimately depends on the manufacturer and how they make their cores, though. There's a pretty substantial difference between an HB Mitsubishi Hi-Uni(very smooth) and an HB Bic Pencil(scratchy, "chunky" marks). And it's not even as simple as "more expensive is better" — sometimes you want a chunky, high friction feel. There's a sweet spot that you can often find by using a major brand manufacturer like Dixon Ticonderoga or Pentel — not the cheapest, but not the luxury brand either. It's worth having two or three options for hardness; harder cores will erase more easily and smudge less so they tend to work better for very precise drafting, but soft ones make bolder marks, which helps you see what you're doing and lets you make stronger indications of shape.
I should also distinguish between mechanical and wood pencils. Wood pencils are relatively self-contained — the density of wood keeps them nicely balanced, and many of them have a ferrule eraser at the end, which can be fine for small erasing jobs. Mechanical pencils have the benefit of staying at roughly the same point size without sharpening. Point size is important to drawing because it changes how much detail you're putting into that line; a large point size will give a rougher, looser indication, so it tends to appear earlier in the process, while fine points let you add in a lot of detail. Preferences for point size depend a lot on how large you're trying to draw: the 0.7mm and 0.5mm sizes commonly used for writing are fine as a starting point, but you might want to try going a little bit smaller to 0.4mm or larger to 0.9mm. Some people prefer going very large and will only work with 2mm lead holders. You'll naturally change some of your habits just by changing the point size, so it helps to have variety.
Pens
Pens can become a serious collector's habit if you want them to be. The baseline to shoot for, though, is a classic ballpoint like a Bic Cristal. These control reasonably well and let you vary the pressure to make interesting textures. Ballpoint in a large point size like the Cristal 1.6mm "Xtra-Bold" can feel pretty smooth and make dark marks, while smaller sizes let you sketch small details. If you want to sketch with an office pen but make more fully dark marks that won't fade, your choices are gels and rollerballs, and I've found that it's hard to get pens in these categories that control as well as the oil-based ballpoints. Often you're making a tradeoff between refills that skip easily, refills that put down too much ink and will feather, and refills that are slippery and hard to control. Of the ones I've tried, Bic Gelocity is my current top brand — it feels close to the Cristal, and does pretty well as an all-around choice. However, all of the disposables change all the time — new formulas, new brands. They aren't really supposed to be relied on for work that lasts, although many brands do offer "permanent" or "archival" inks these days — Uni-Ball has made a point of it, and I like their 207+ gel and Air roller pens.
The more serious options, for your "nice" paper, are mostly in the categories of dip pens and markers.
Dip pens are a little bit intimidating, but are very cost effective if you do a lot of drawing. Just treat them like silverware and scrub them off a little each time you use them. I recommend these if you just aren't happy with the look of your lines and want to get a more refined shape, because they're sharper than other types of pen and will really "carve" into the paper in their fine points, giving you a high-friction line with tons of control.
Markers are the option for someone who wants the experience of disposability and portability but still wants some refinement. Markers come in huge variety because every manufacturer comes up with a unique tip design. I really like using brush markers like Tombow Fudenosuke and Uni-Pin Brush since those have rubberized tips, giving a little bit of character to the line while still keeping some control. These markers are aiming for something different from "soft" brush pens, which produce very broad strokes that are made for calligraphy. The calligraphic brushes can also be used in drawing but will produce very expressive marks that impose unexpected shapes — it takes a lot of practice to control them, and it helps to start by working up from the harder brush markers.
I also like markers with plastic tips like Papermate Flair Ultra-Fine: the plastic doesn't wear down or fray like felt tip markers, and the line that you get has a laser-like consistency. I should note that Flairs aren't designed for archival use — that comes down to the difference between dye inks(which fade quickly) and pigments(which have some permanence). But it may not matter if you ultimately want to finish in digital and aren't trying to keep around the originals.
Erasers
Erasers seem like you can overlook them easily, but actually, it's worthwhile to explore the different kinds of eraser. The most important category to look into is the eraser putty, which is a stickier form of eraser that will grab graphite off the page with less effort. This is a great tool to have around to keep your workspace clean and minimize damage to the paper, and they'll last for months before you've completely saturated them with graphite. The other types of eraser are mostly tradeoffs along a spectrum of point size, crumbliness, and erase strength. I have a 50-pack of white Pentel eraser caps and I put those on my wood pencils, since they are pretty handy for quick erase jobs. I have not used electric erasers but they are apparently quite good for making detailed graphite drawings with white highlights.
Sharpeners
If you are working with pencils, you probably also want to have sharpeners. Art students often learn how to hand-sharpen their points with a blade; that lets them get the funny-looking "elongated point" where they've shaved away all the wood and there's only the lead core. I can't be bothered with it though. I use generic cheap sharpeners with my wood pencils, and mechanical leads for the more precise stuff. Custom sharpening does change the weight and balance of the tool, and this can become a reason to pursue it if you become very discerning about your pencils, but a generic sharpener will get you 80% of the way there.
Stencils
Finally, stencils are worth discussing in some detail. Sets of stencils for drafting can be found cheaply online and give you a handy combination of shapes, straight edges, and ruler markings, making them tremendously helpful for two completely different reasons:
- They help you practice your draftsmanship. Getting better at drawing a good circle is aided by having stencils as "training wheels".
- They let you quickly put together some graphic design. The combination of the measuring and drafting tools and the rule lines of notebook paper makes it really convenient to work out how large things should be relative to each other, which is one of those basic issues you encounter when cartooning and making comics that can be a source of frustration if you start off the drawing in freehand, with no guides.
Conclusions
While there are many more tools and art supplies that could be listed, these are the ones that I think have a lot of power to send me in the "right direction". A lot of the problem of cartooning is not with the drawing techniques, it's with finding a way to assemble a little production — words and pictures that work together. That takes a deeper, more layered process than just making one image that looks good, which is what is covered by the majority of drawing instruction. There are a lot of things that are being juggled and it's easy to feel overwhelmed and drop some of them, which leads to a lot of beginner comics that are unreadable or unattractive for reasons that aren't because the drawing is bad or the script is poorly written.
In a future entry, I'll follow up with more ideas about what I've done to practice and the best resources I've found.